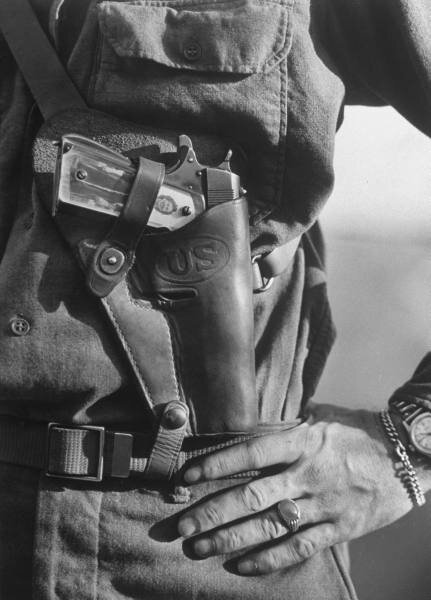
When I got my hands on a piece of scrap plexiglass, I got the idea to make a pair of custom grips for a replica Colt 45. My earliest memory of one like this is an example on display at the Imperial War Museum in London. They can also be found in reference books and many examples (original or not) can be found online. Pistols or revolvers with plexiglass grips were more common towards the end of the war, as I gather from photos in the many reference books I have. So you won’t see them in photos of Normandy, but during Market Garden and afterwards, they were quite common.
Making these grips is not difficult and can be done with basic tools, but I thought I’d share the steps with you, so you can try it for yourself. It’s an amazing and inexpensive way to pimp your Denix or airsoft M1911A1. The grips that come with these replicas are often terrible anyway. Many replace them with wooden grips, but that’s not really authentic.
What tools do you need, apart from a piece of plexiglass?
- A screwdriver to remove the old grips and install the new ones
- A sharpy to draw the outline of the grips on the plexiglass
- A basic jigsaw
- Sanding paper and files
- Polishing cloth
- A drill
- A sharp cutter and a cutting surface
- A photo or printed pinup
- Plastic backing material (e.g. from a document sleeve)
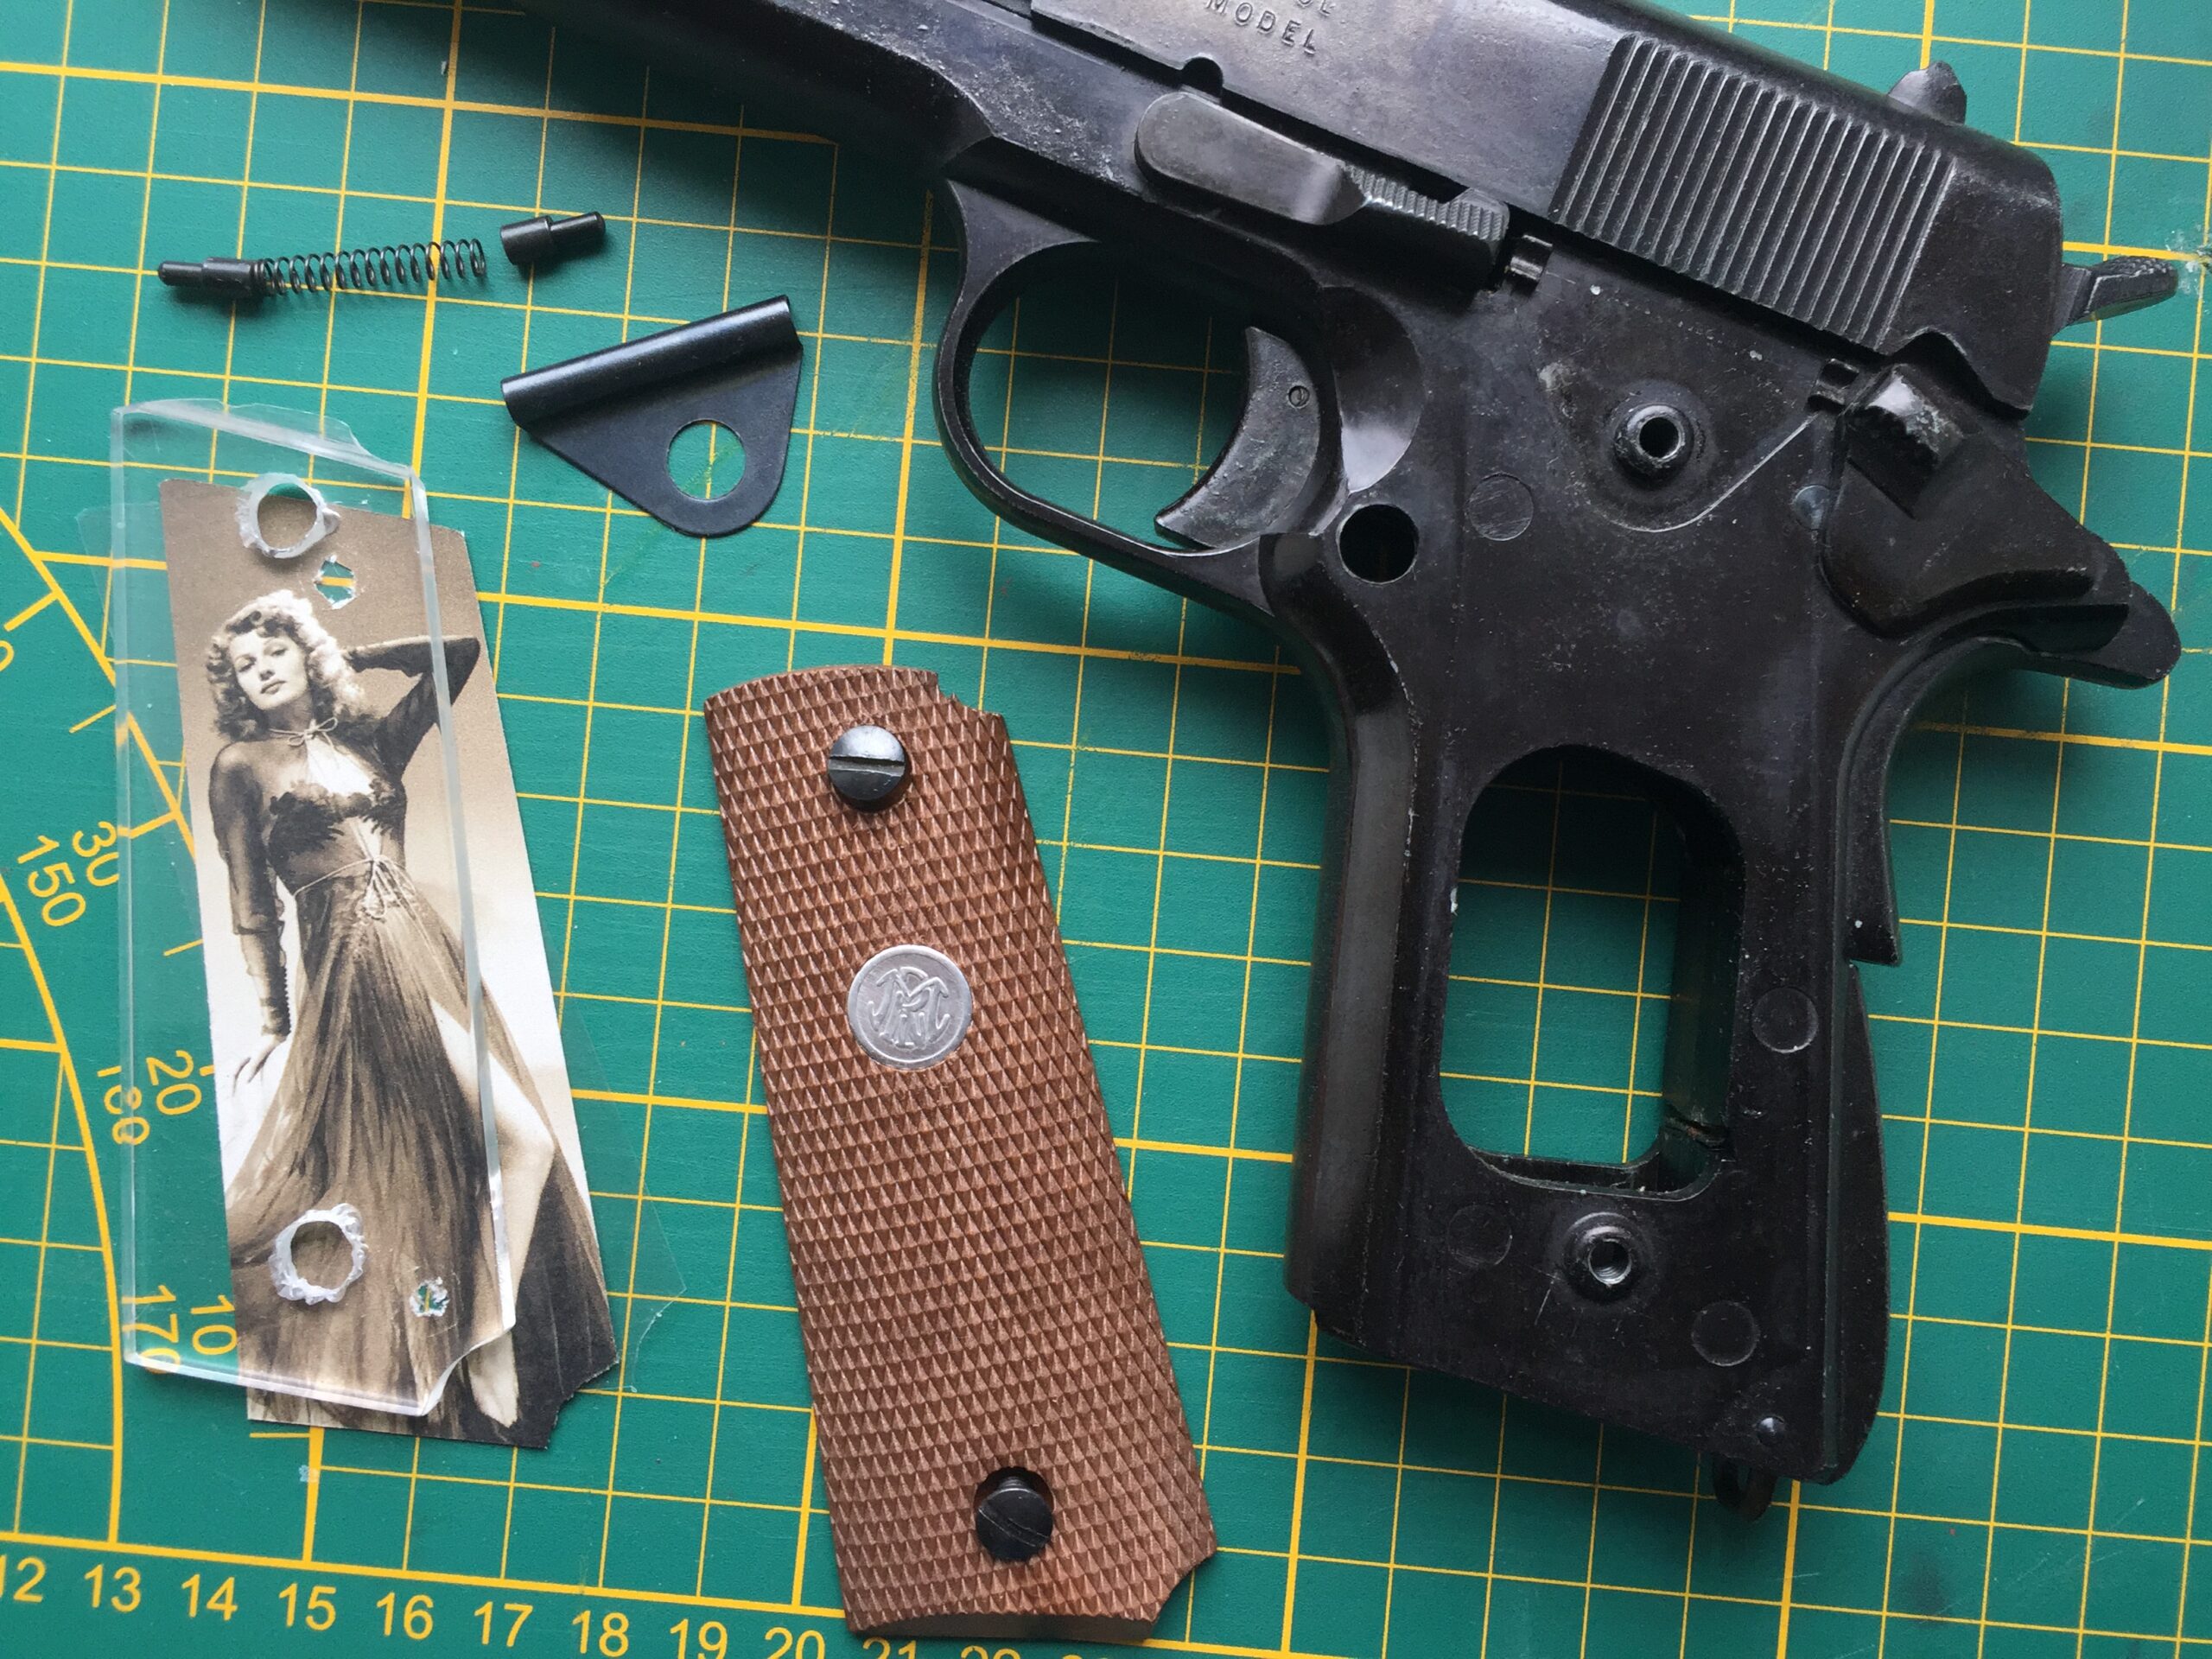
Step 1: remove the old grips and draw their outline onto the plexiglass
Be careful for any spring-loaded small parts flying away when you do this! On my replica, the magazine catch spring blade is held in position by the right-hand grip only. And on the left side you have the spring and guides for the slide catch and the safety catch are also held in place by the grip.
Now you can draw the outline of the old grips onto the plexiglass, using a fine sharpy. I lined mine up with the edge of the plexiglass so as to have one side less that needed to be cut. Also draw the position of the screw holes.
Step 2: cut the plexiglass
I would recommend that you first practice with the jigsaw on a corner of your piece of plexiglass before attempting to follow the lines you have drawn. When you are ready cut the plexiglass as close to your lines as possible. Don’t worry if it’s not a really straight line, but avoid cutting away too much to the inside of the grips. You can file the rounded recesses and sand away any surplus material afterwards. Regularly compare your new grips with the originals to make sure they will fit. The most precarious bit is the top of the left-side grip that goes over the spring housing of the slide cath and the safety catch. This part is very thin, so be careful when you file away this recess with a small round file (you can see on the pictures that I dropped my grip and a small chip broke of at this place…).
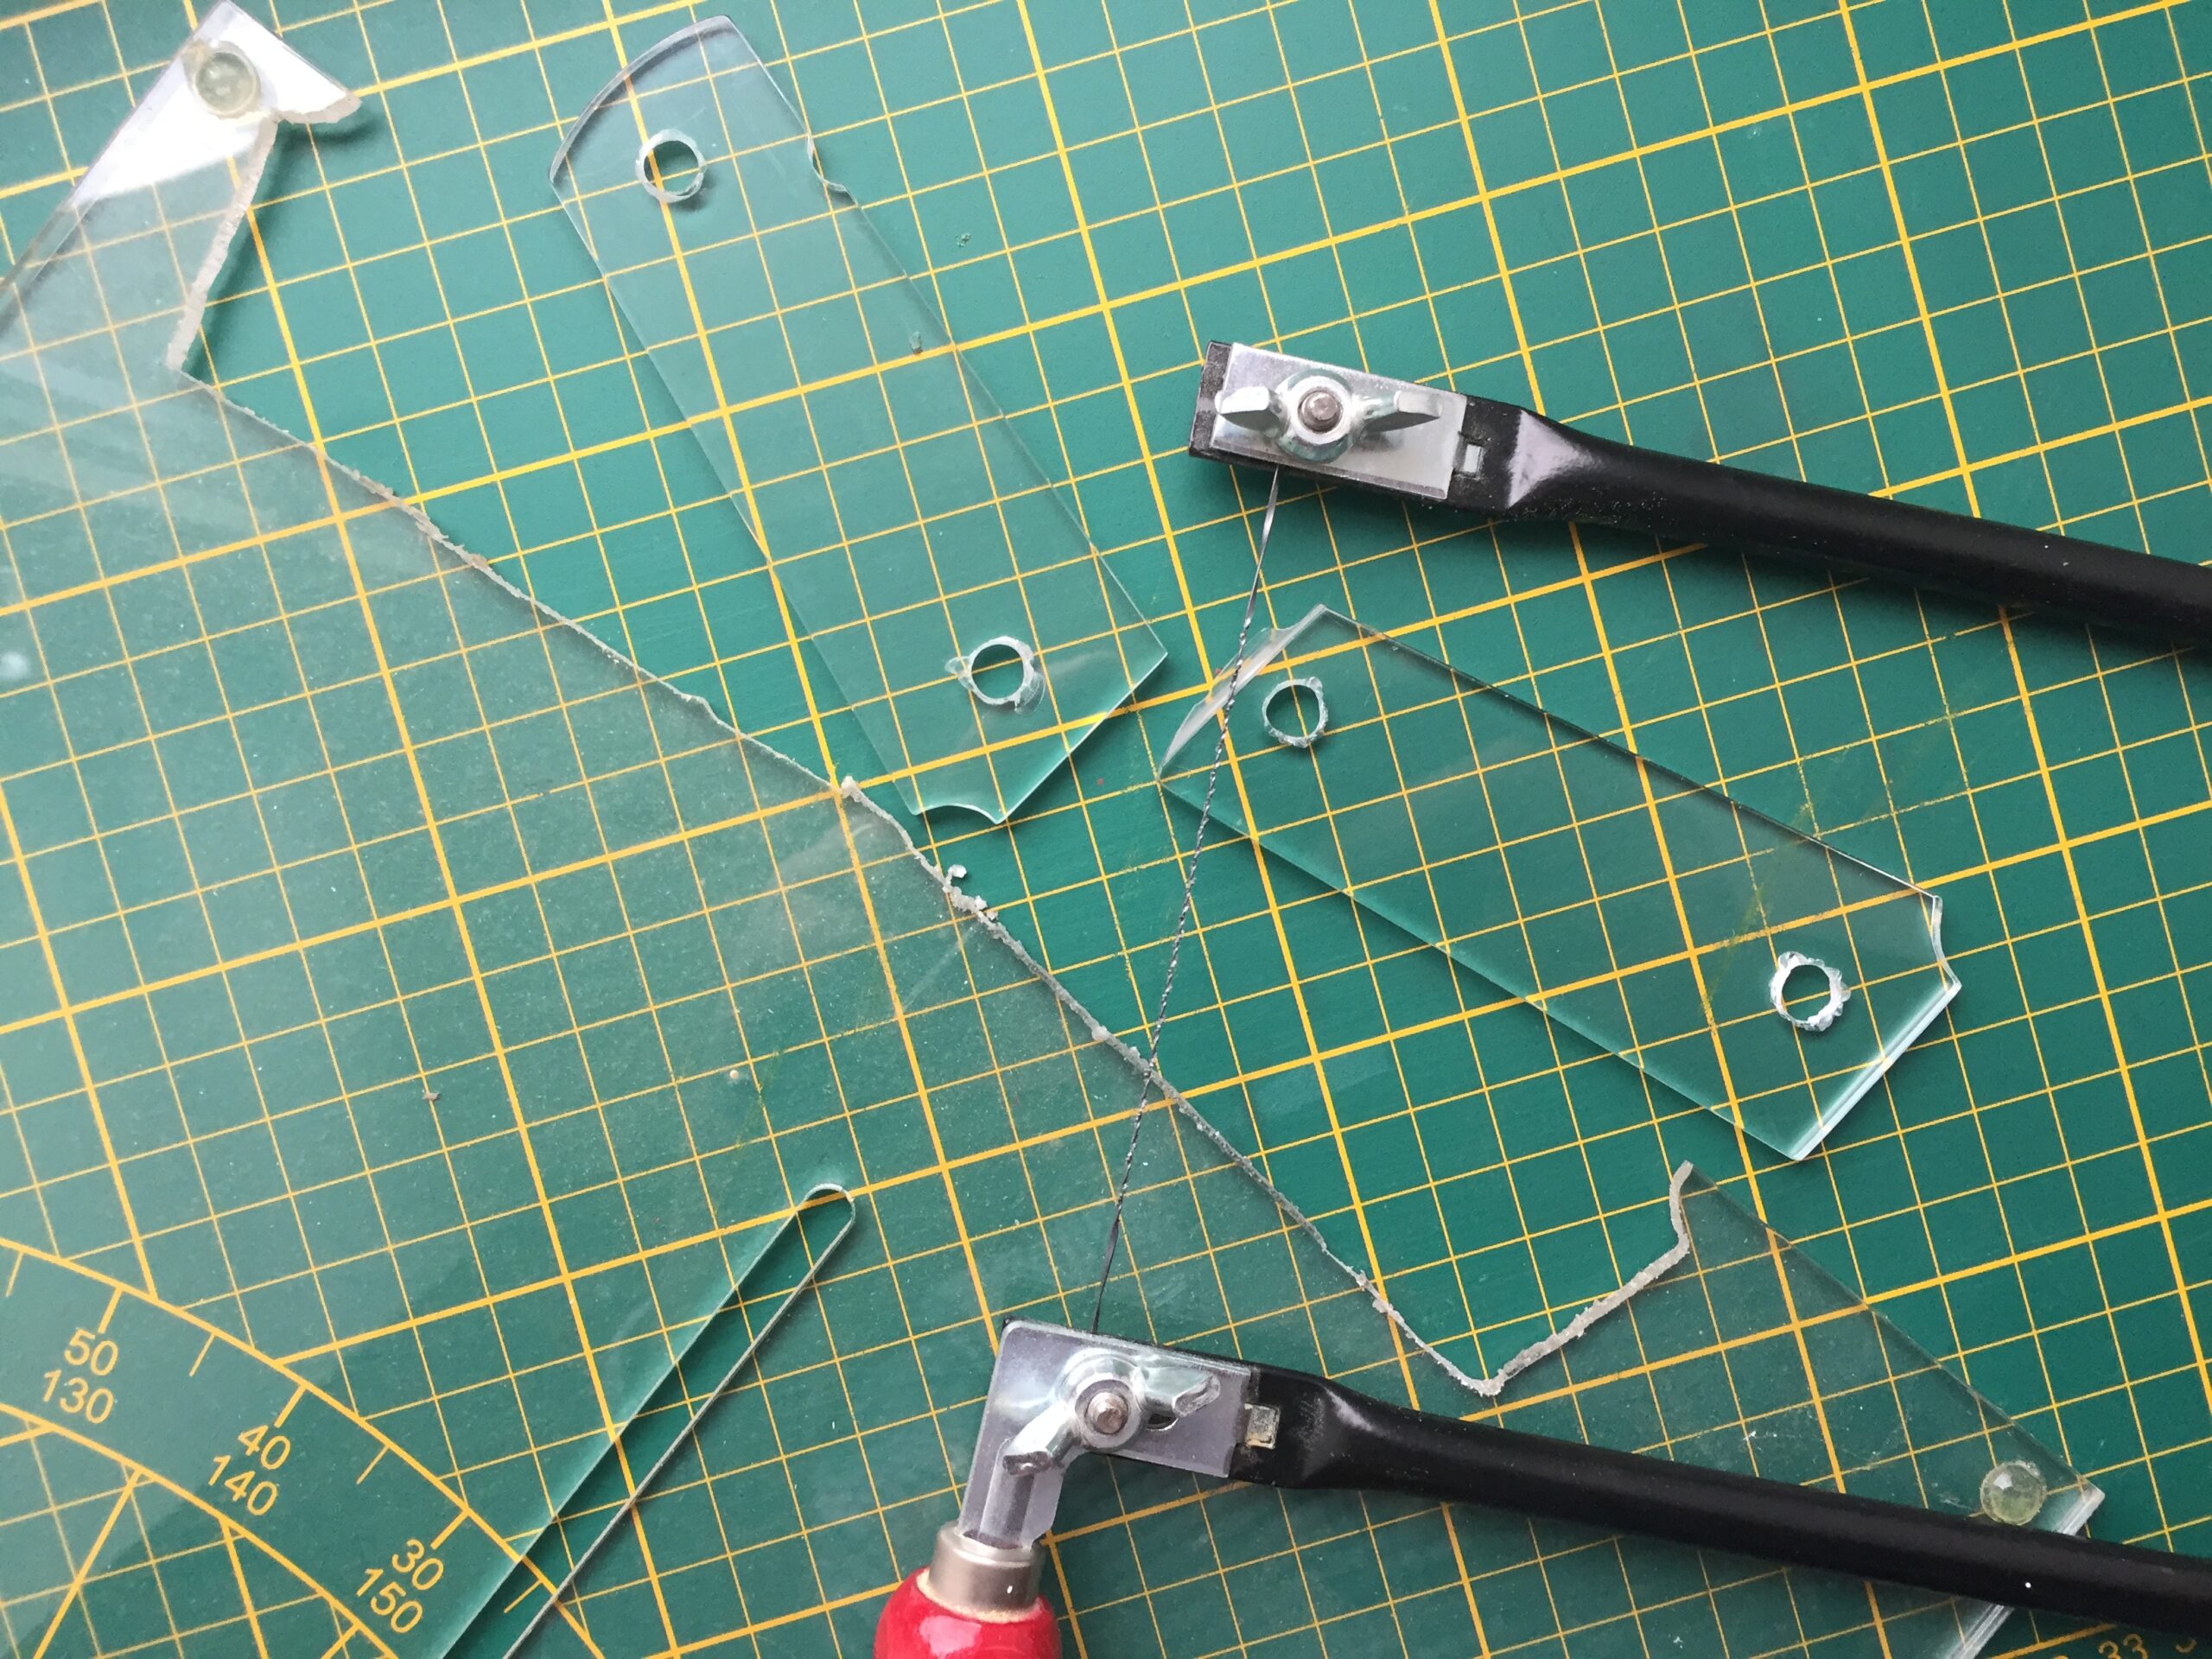

Step 3: drill the screw holes
As you can see on my grips, and on most photos of orginal WWII sweetheart grips, the plexiglass can chip when drilling the screw holes. I haven’t found a way to avoid this. If you have a column table drill, I guess it’s possible to have more control over the result. It doesn’t bother me much because originals mostly have this same defect.
Depending on your replica, the holes may need to be larger on the inside than on the outside. Usually the screw heads go into a recess in the grips, but not all the way through the grips. Also, the length of the screws depends on the thickness of the grips. In my case, the plexiglass is flat, so the grips are as thick in the center as they are on the sides, which isn’t like the original bakelite grips, but this allows for the screw heads to clamp to the top of the plexiglass, so they aren’t recessed. That way, they are still long enough and you don’t need to drill a complicated hole that’s wider on the inside than on the outside.

Step 4: polish the plexiglass
Using a soft cloth and maybe some car polishing liquid, you gently start rubbing the plexiglass until you have gauged the effect of the polishing liquid and the cloth. If you start out too fanatically, you may make deep scratches, which will then take a lot of time to polish away again.
I personally didn’t bother to make the grips rounded (flatter on the edges than at the center). That would be very difficult to do right, unless you have a sanding table or other fixed mechanized tool to obtain a straight result.
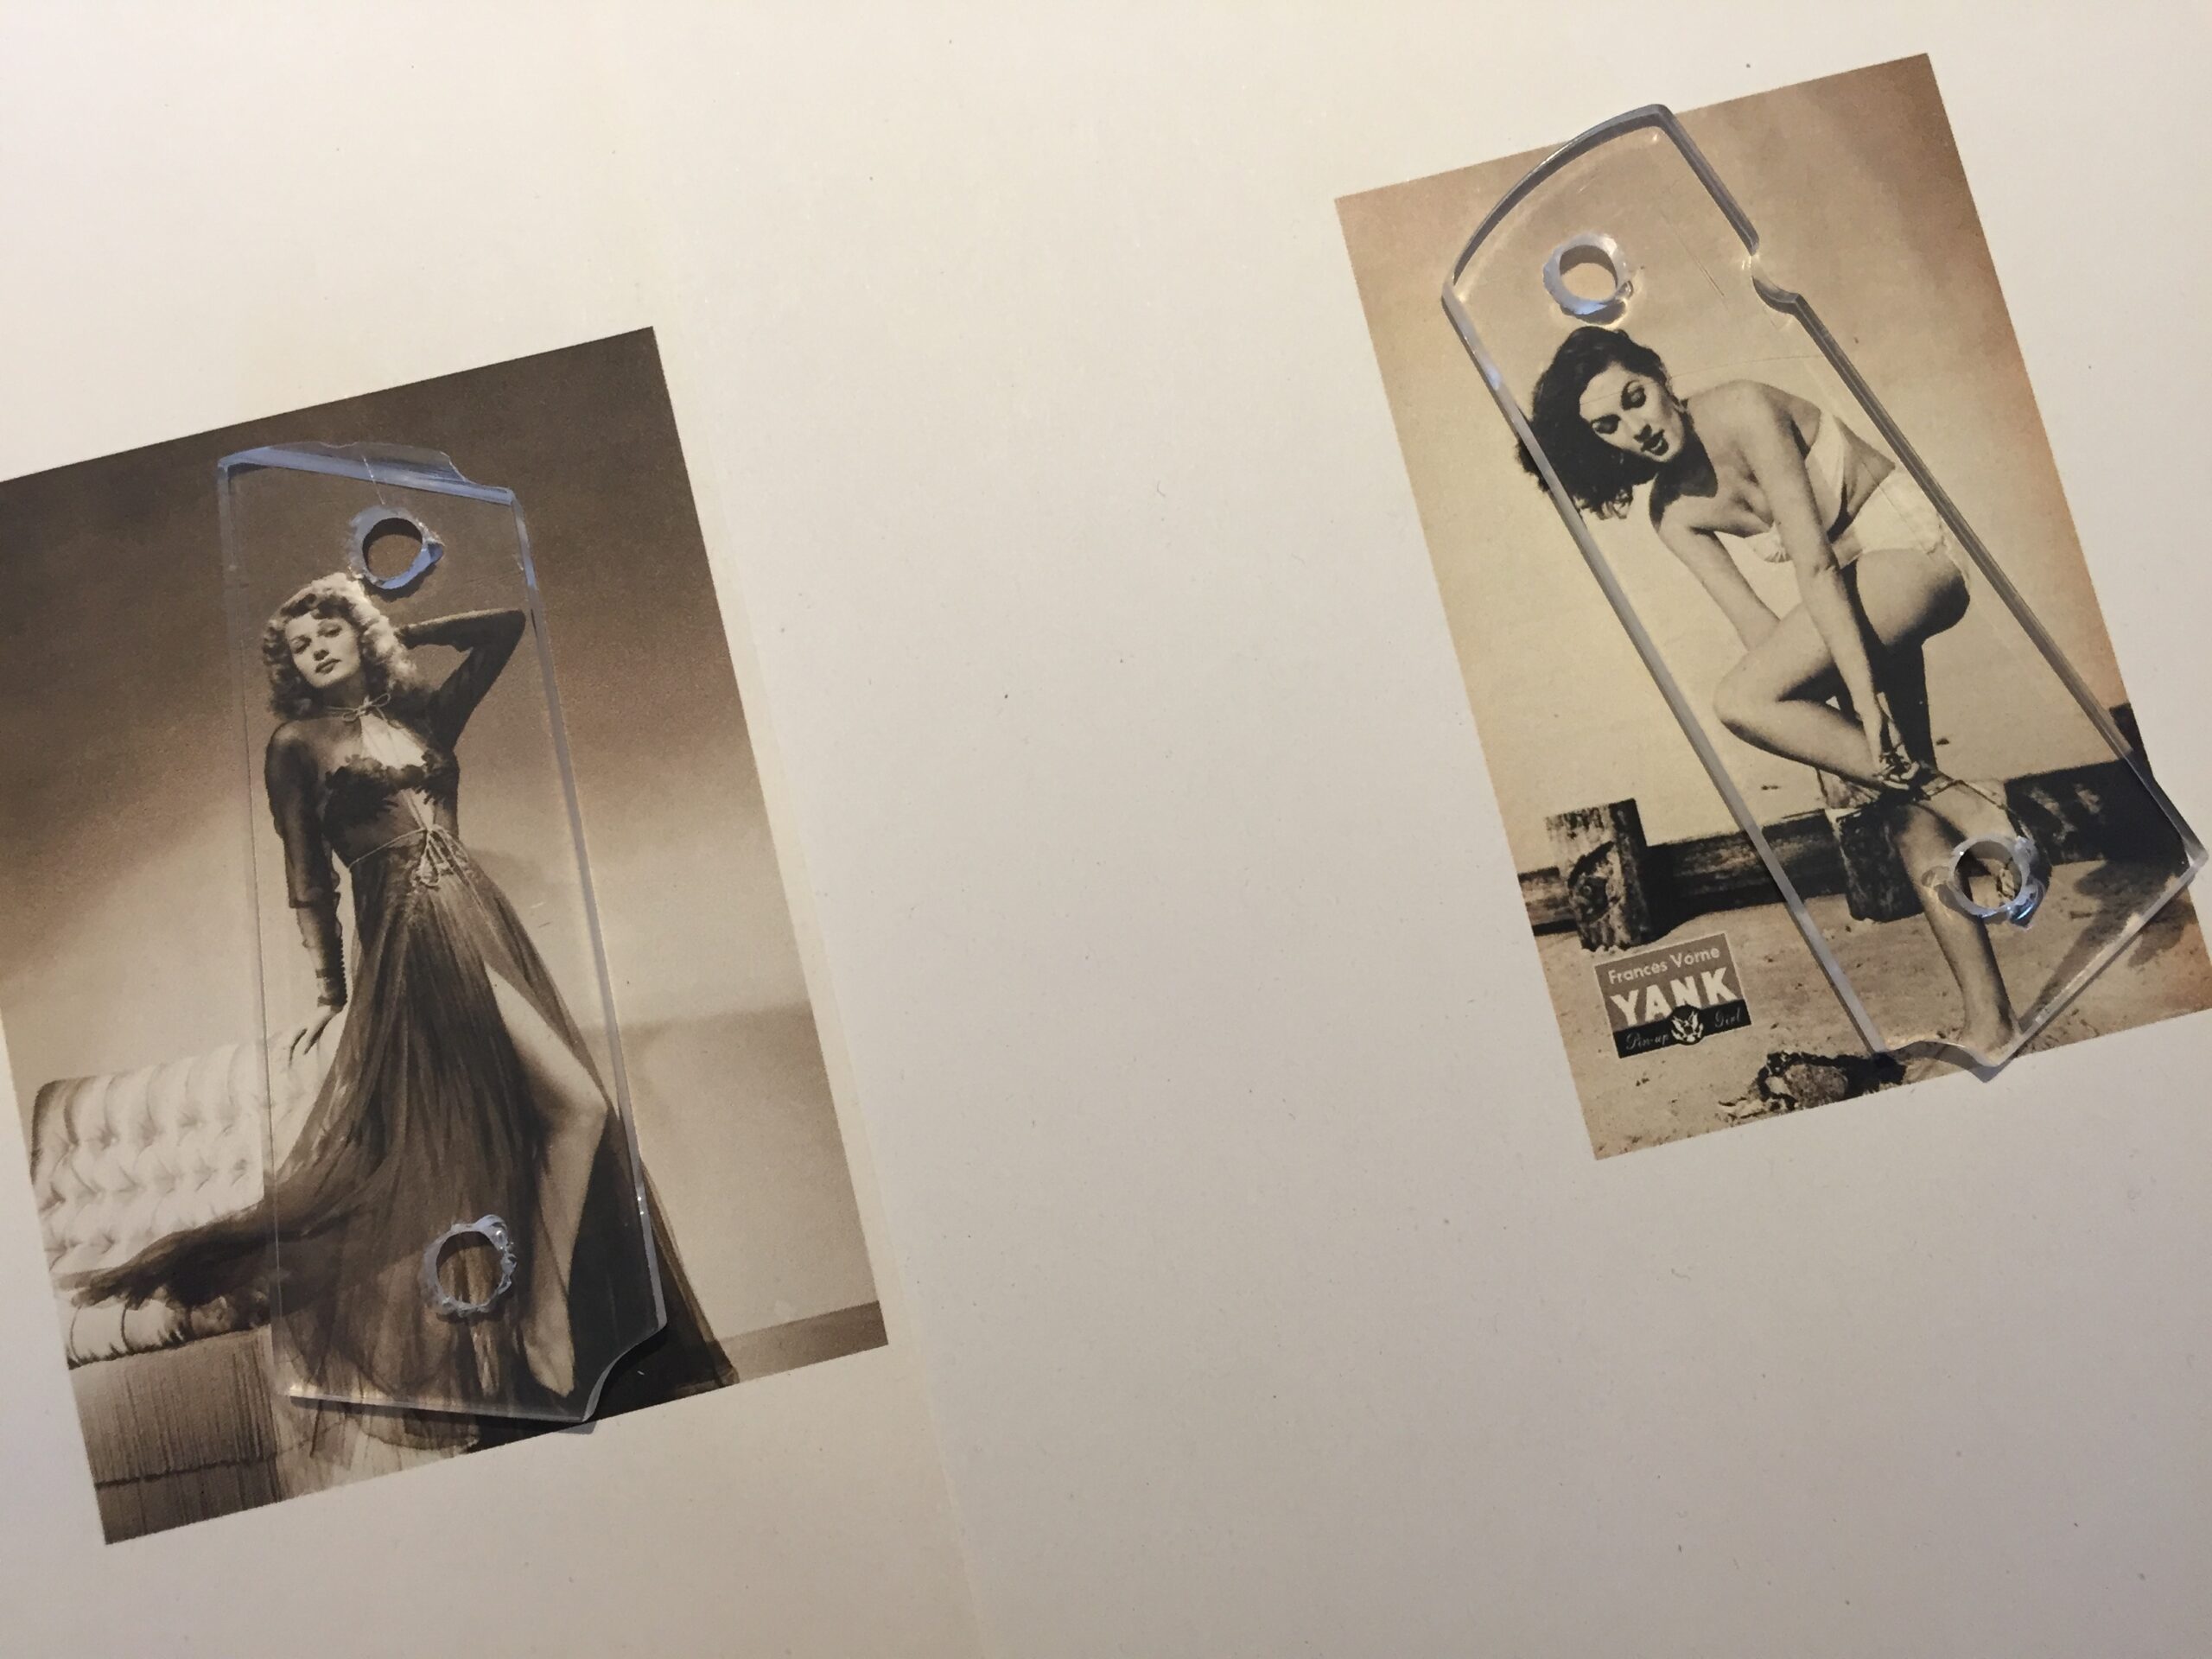
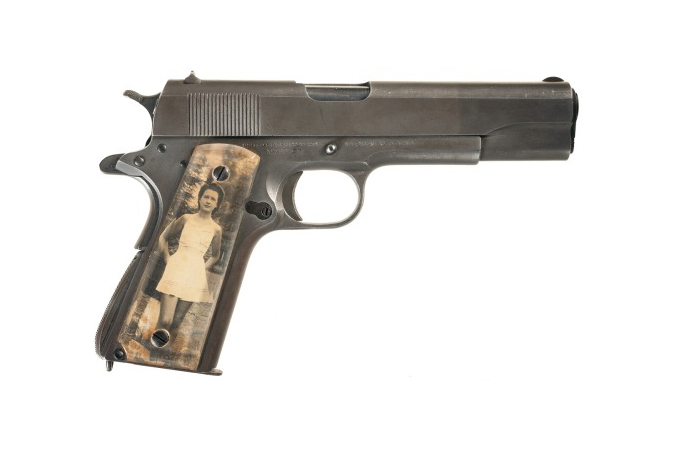
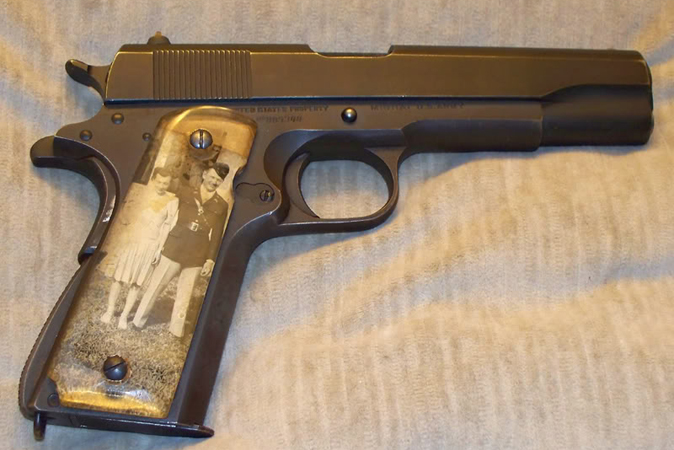
Step 5: find sweetheart photos or pinup girls
I thought this was going to be the easy part – finding WWII pinup photos online – but it isn’t really. The problem is that the girls’ heads are usually at the top edge of the photo. If you use them like that, the screw hole will end up in the face. Not nice. This is where Photoshop comes to the rescue. Use the ‘content aware fill’ feature, you can extend the background, so making the photo taller without stretching out the girl that’s in it. You can see the result of this in my photos. Here’s a Photoshop tutorial about the content aware fill.
I also added some yellow-brownish tint, because plain black and white didn’t look old enough. That’s up to your taste.
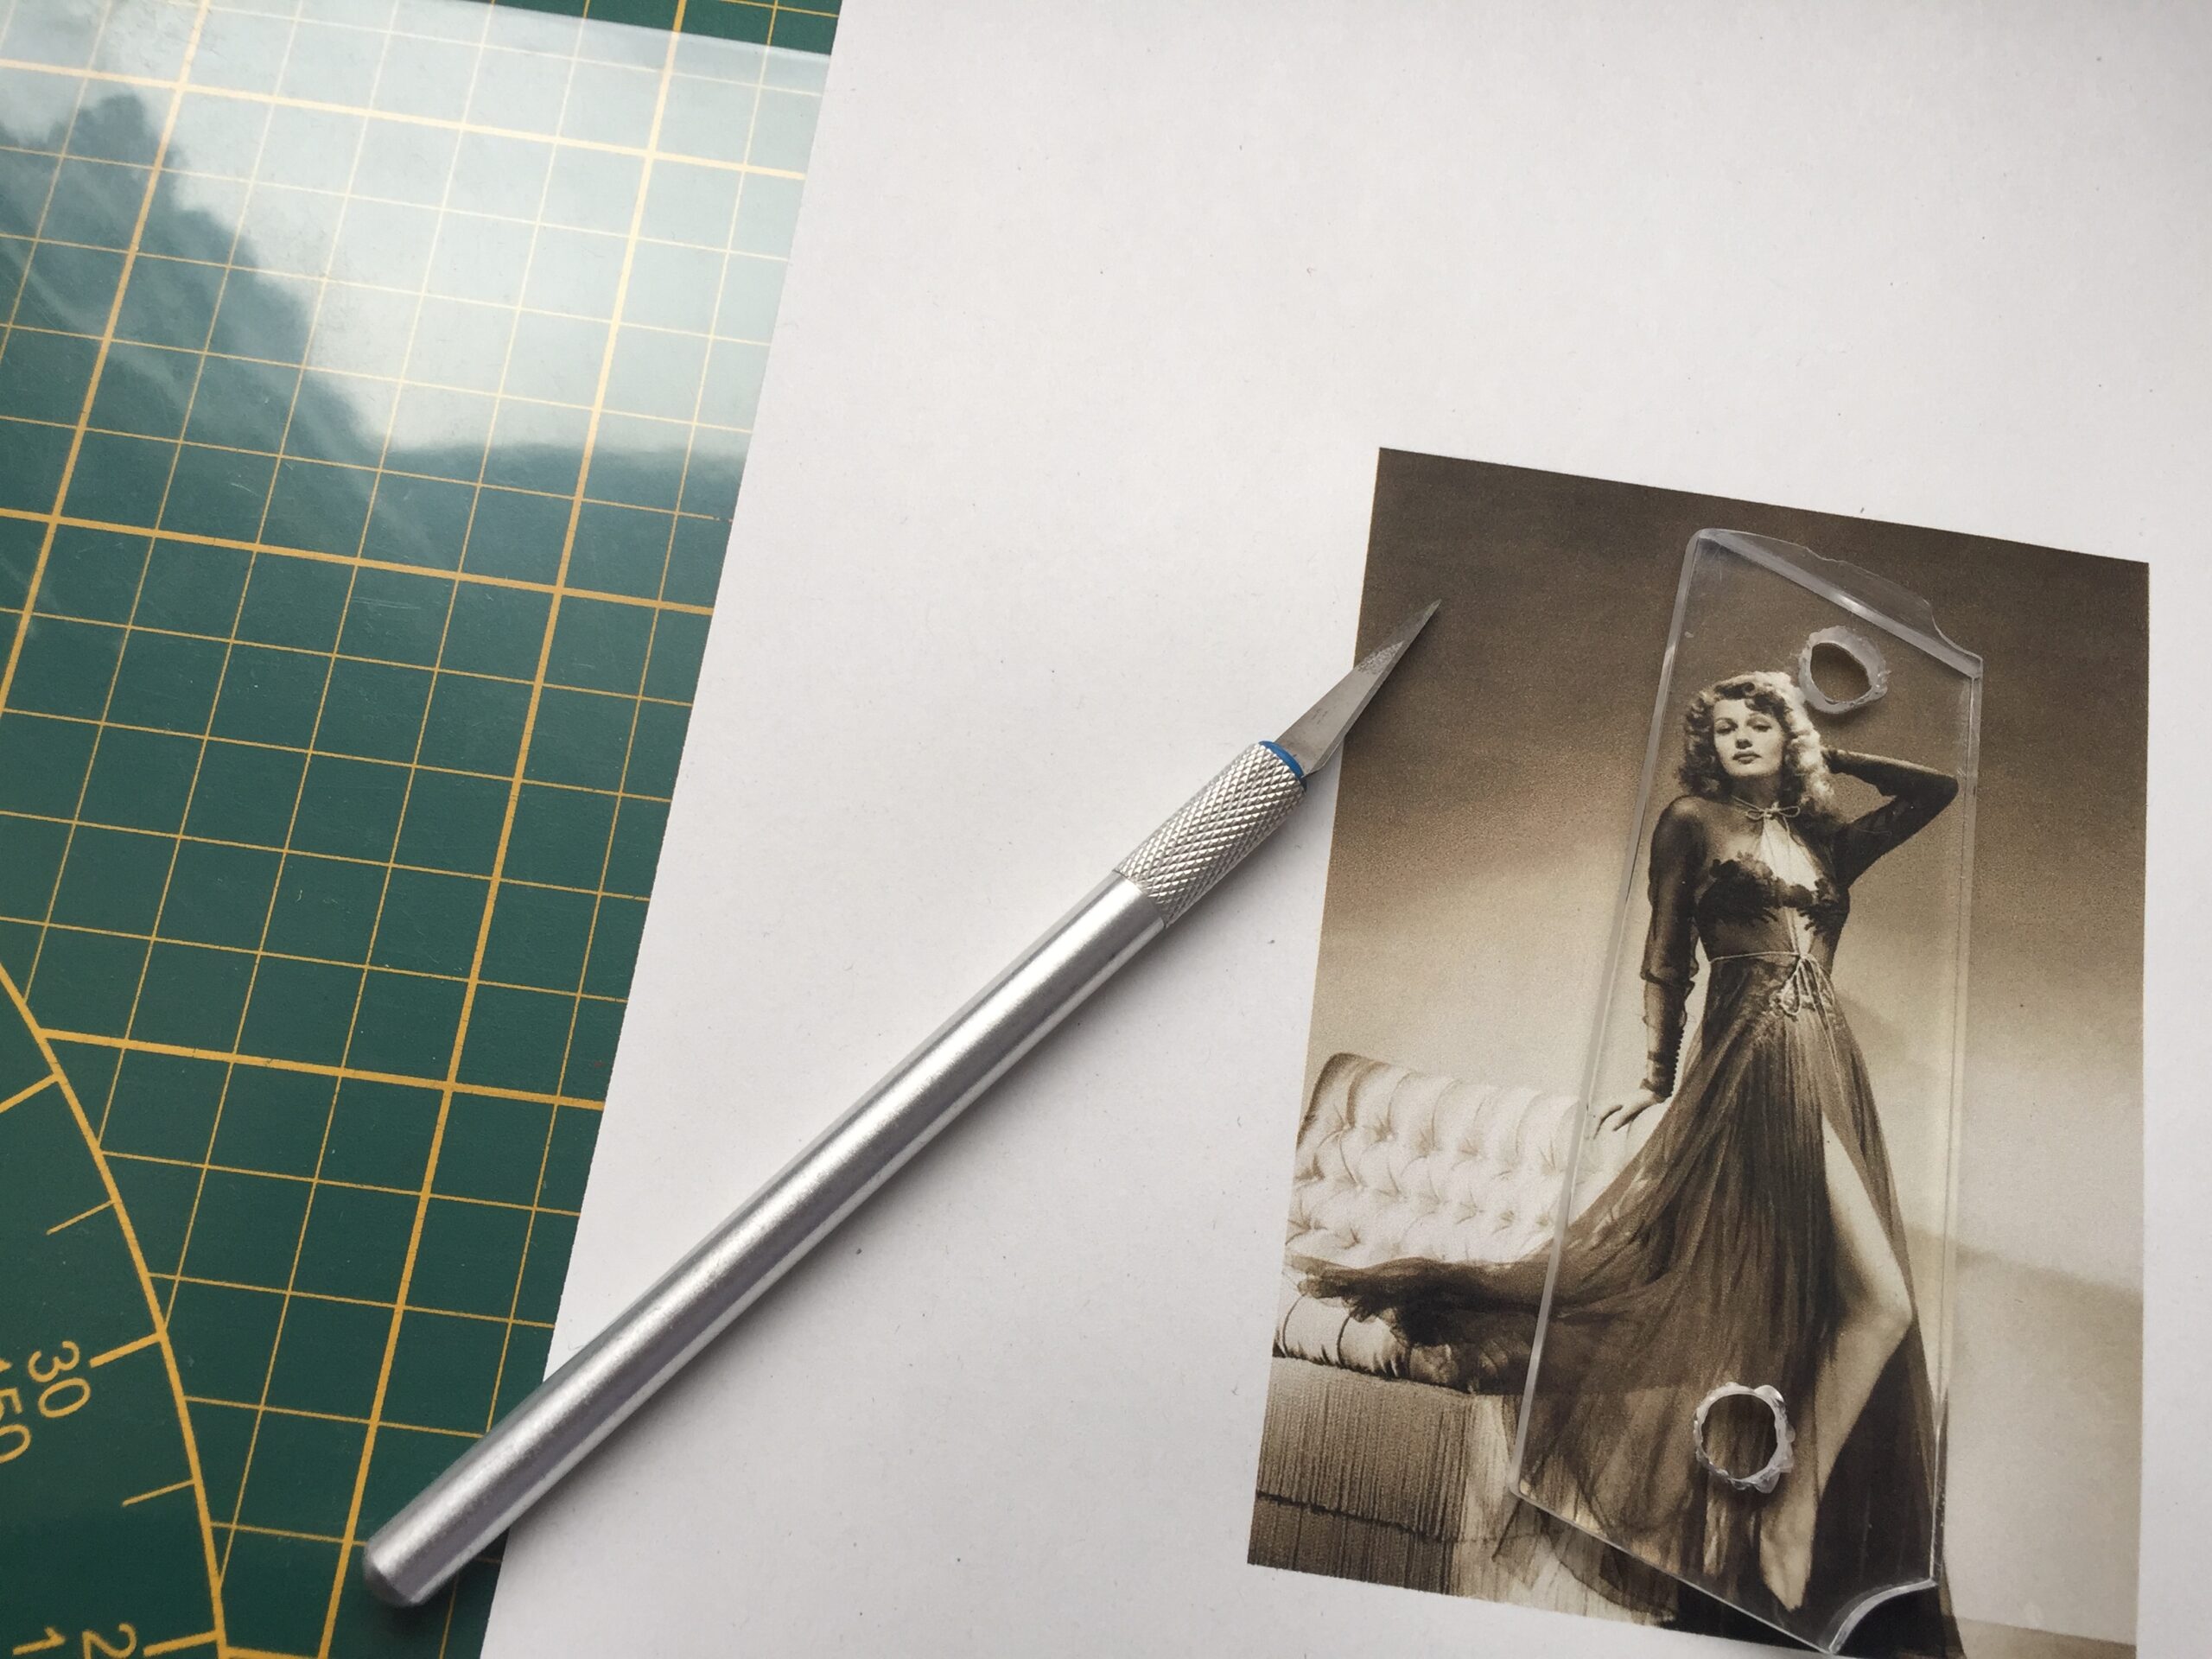
Step 6: cut the photos and backing sheet
I recommend using some fine plastic sheet material as backing for your photos, especially if you have printed them on your home printer. I used plastic from a document sleeve. The reason for this is that the paper is thin and the pistol may be greasy. This may cause the paper to deform. Position the grip on top of the photo, with the plastic sheet at the bottom, and then press firmly on the grip while cutting the paper and plastic along the sides of the grip, using a very sharp cutter.
Cutting away the holes and the rounded recesses takes some care and patience, but then you are all set to install your new grips!
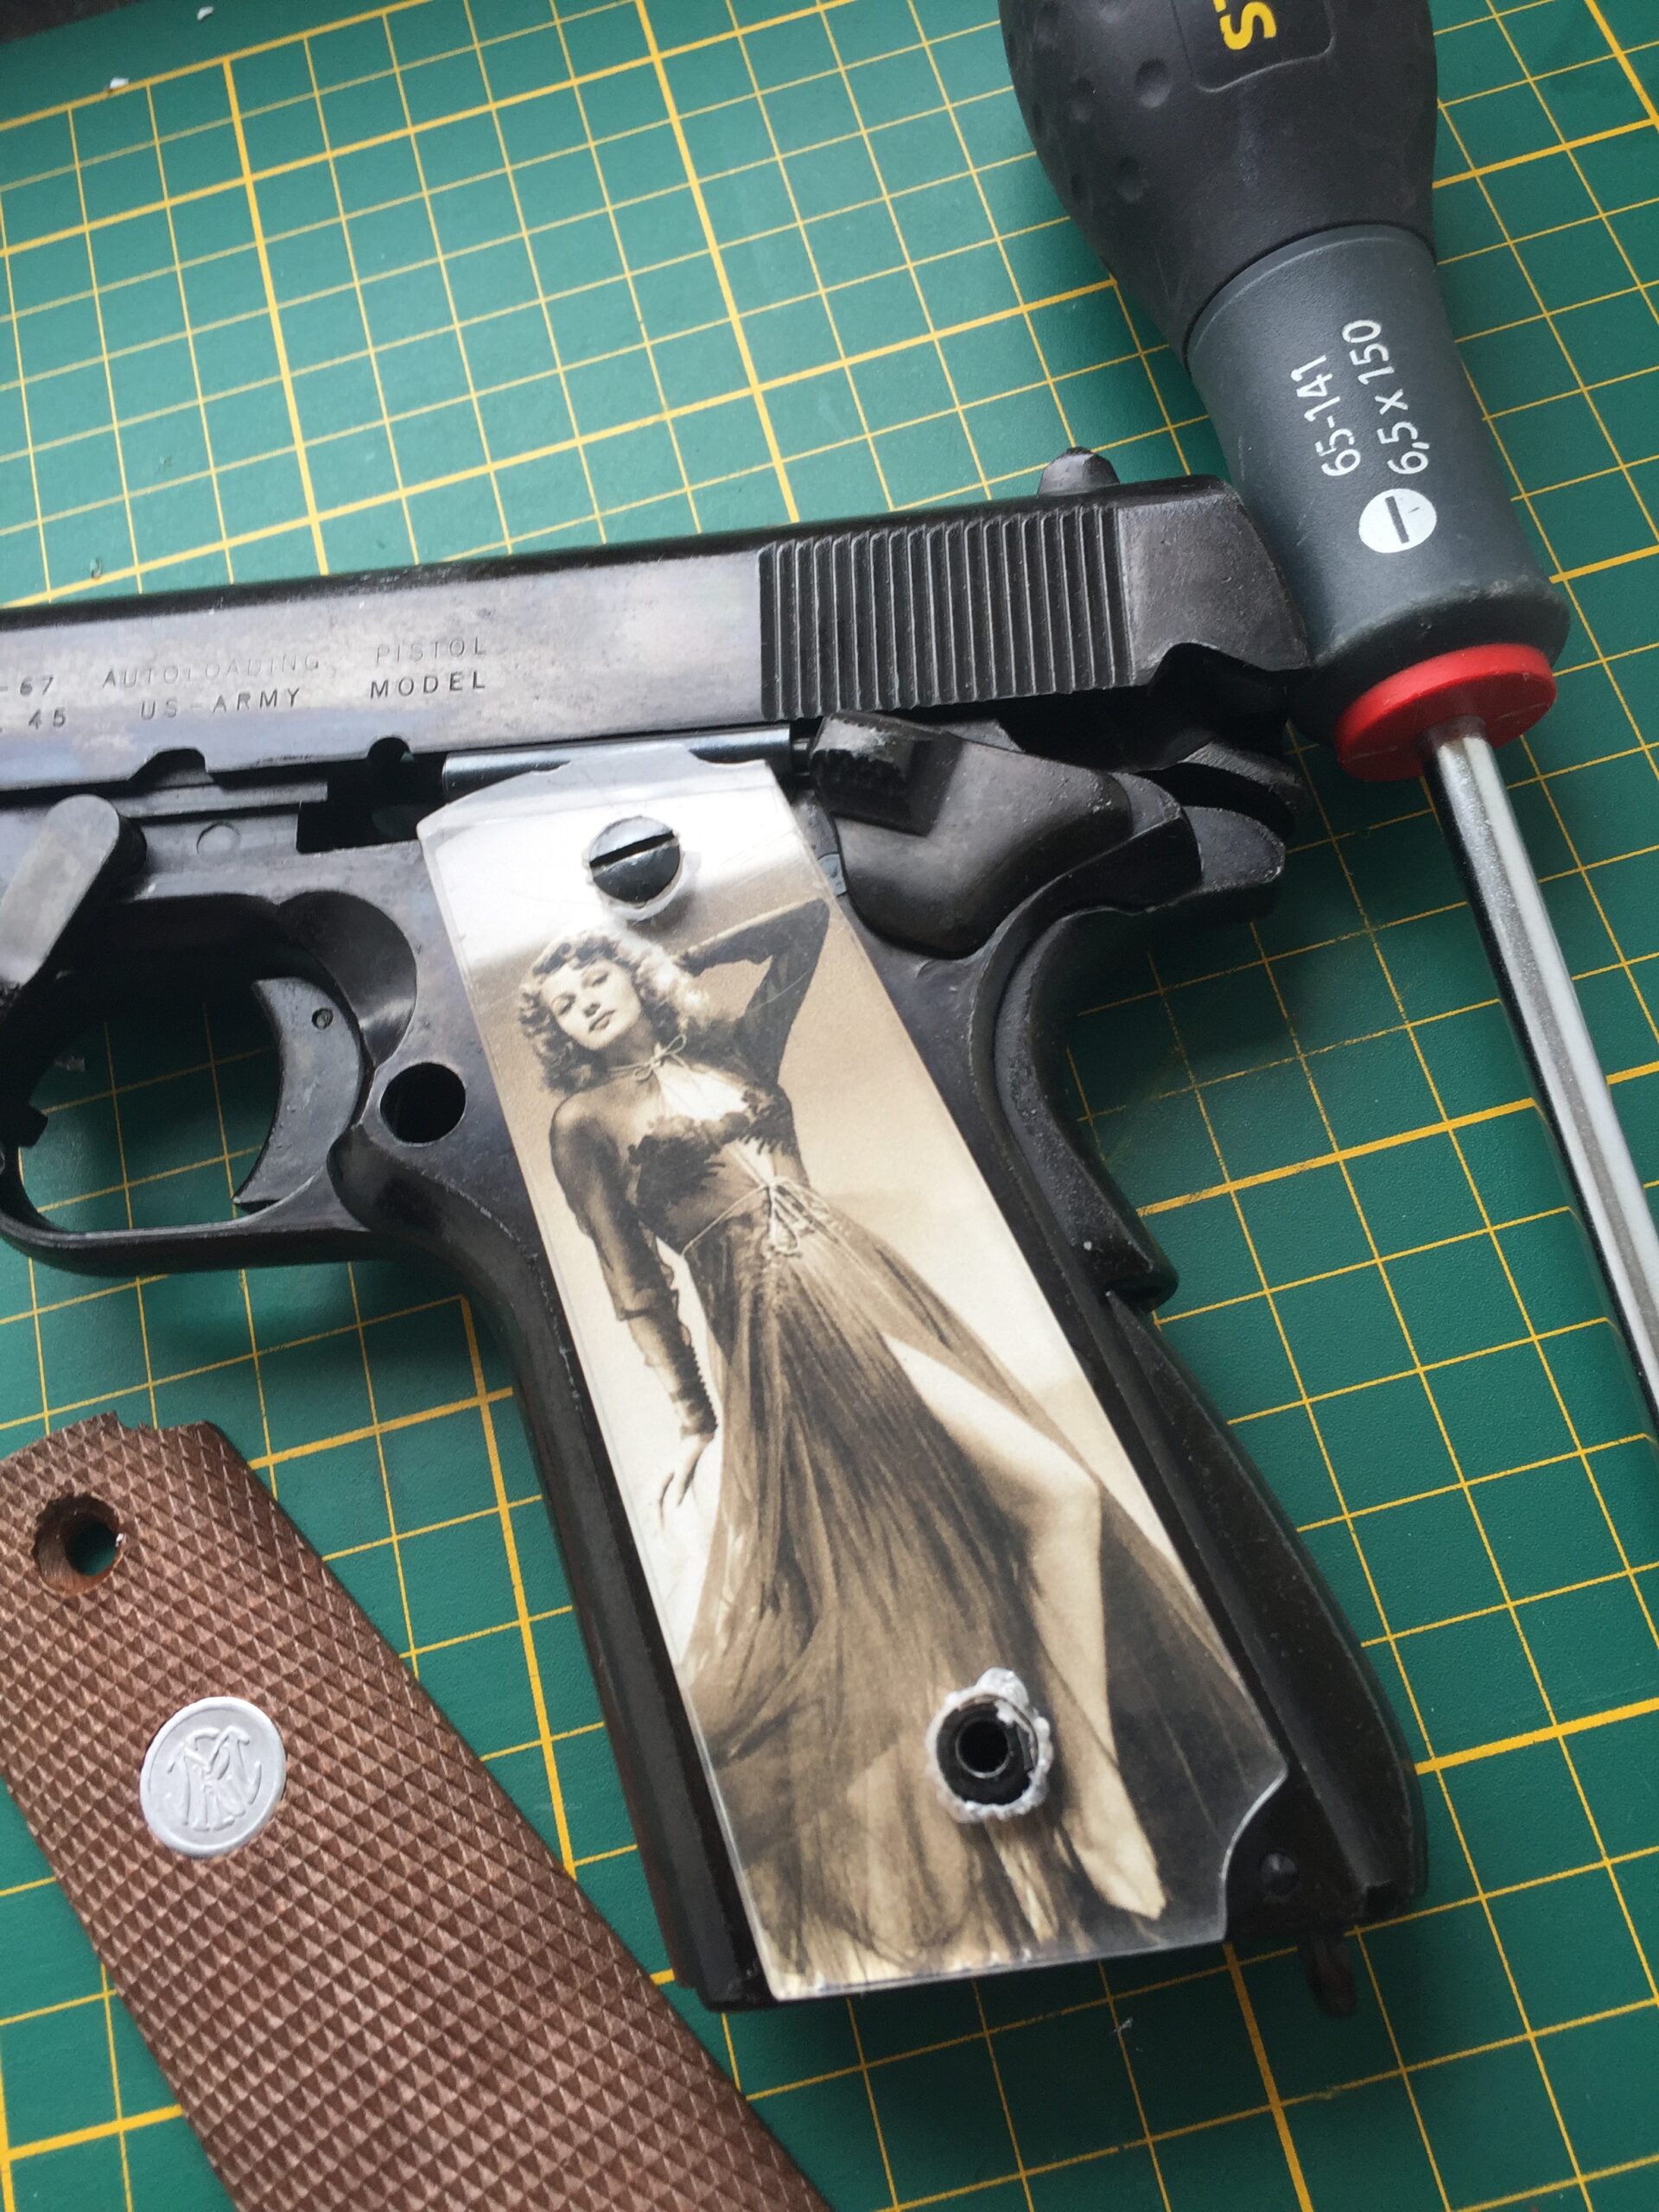
Step 7: install the grips, and enjoy!
When installing the grips, don’t tighten the screws too much. You don’t want to drive them through the plexiglass, or break it.
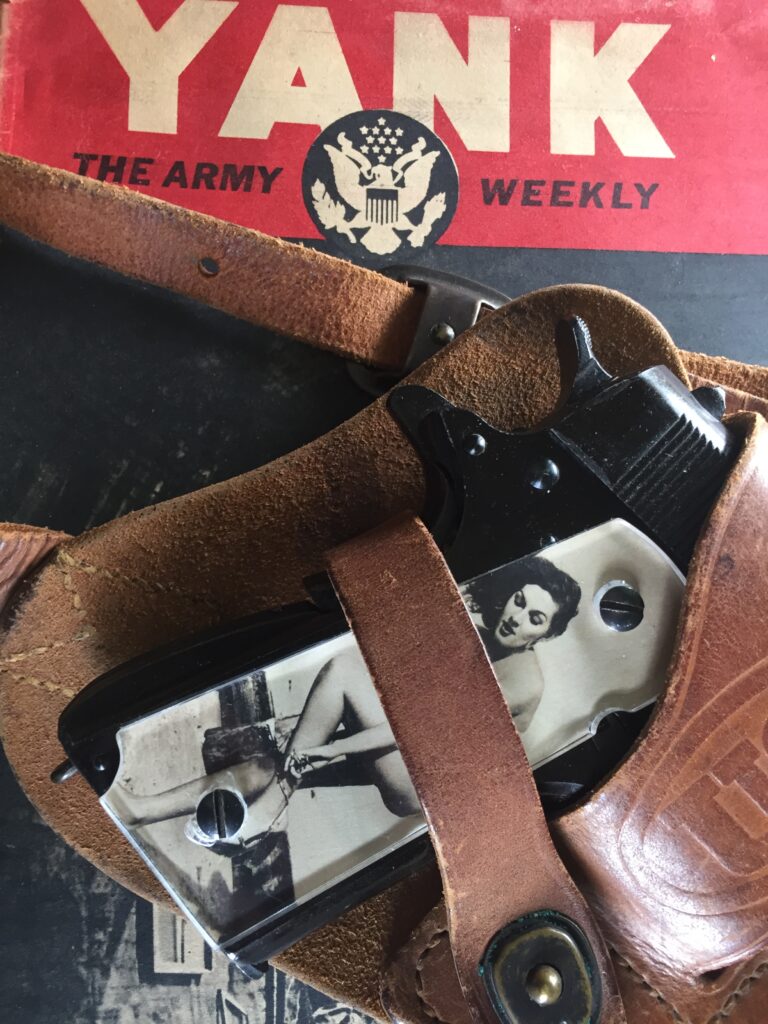
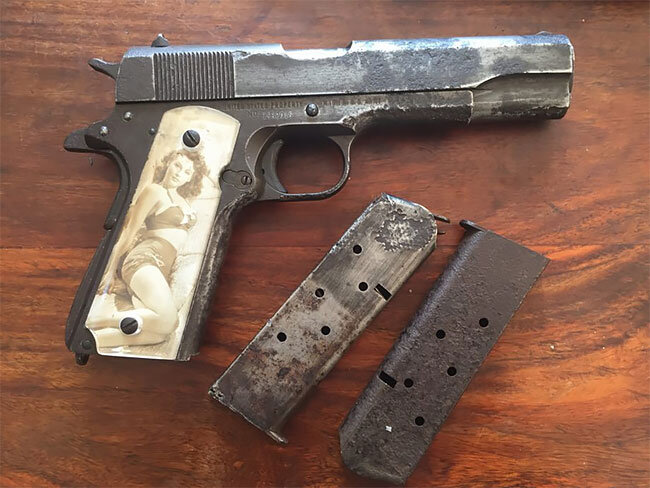
Voilà, my Colt is ready for display!
Here are some pictures of actual wartime sweetheart grips:
I hope this can inspire you to make your own. I look forward to receiving photos of your own handywork!

What is the thickness of the plexiglass?
Thanks
Hi Norman, the thickness of the plexiglass I used is 4mm. There should be plenty of scrap material around after Covid 😉 Good luck with your project!